And the Motorola Moto G5 was no different either. The octa-core Qualcomm Snapdragon 430 chipset coupled with Adreno 505 was worth the appreciation during the time it was released. Then with up to 32GB storage and 3GB RAM, a 13MP rear camera and 5MP front-facing camera were quite decent as well. It came with a 2800mAH battery which three-four years back might have been just sufficient to last an entire day on normal usage.
How to Fix TWRP 0MB Internal Memory IssueHow to Fix TWRP Error 70 [With Screenshots]Fix TWRP Error 7 (While Flashing Custom ROM via TWRP)How to Fix TWRP Error 20 GApps after flashing LineageOS
Along the same lines, the device was also quite an active player in custom development. From the ability to flash custom binaries to installing a custom recovery like TWRP, the possibilities stand endless. Along the same lines, you could also root your device via Magisk. This will then allow you to flash Magisk Modules, Substratum Themes, Xposed Framework, and the likes. However, all these tweaks came with an uninvited guest in the form of Risk. If you end up flashing an incorrect binary or messes up with the instructions, and there stood every possibility of the device going soft-bricked or in a bootloop. Well, in that regard, there is the LMSA Tool, which in my case failed to unbrick or restore my device to normal working condition. As a result, I came out with this tutorial. Here we would be doing the exact same thing that the LMSA Tool does, but manually. So without further ado, let’s start off with the guide to install the stock firmware on your Moto G5 device via Fastboot Commands.
Disable DM-Verity or Android Verified Boot without TWRPRoot Android 11 via Magisk Patched boot.img (without TWRP)How to Update Magisk ZIP and Magisk Manager (without TWRP)Fix Magisk Module Bootloop without TWRP Recovery
Prerequisites
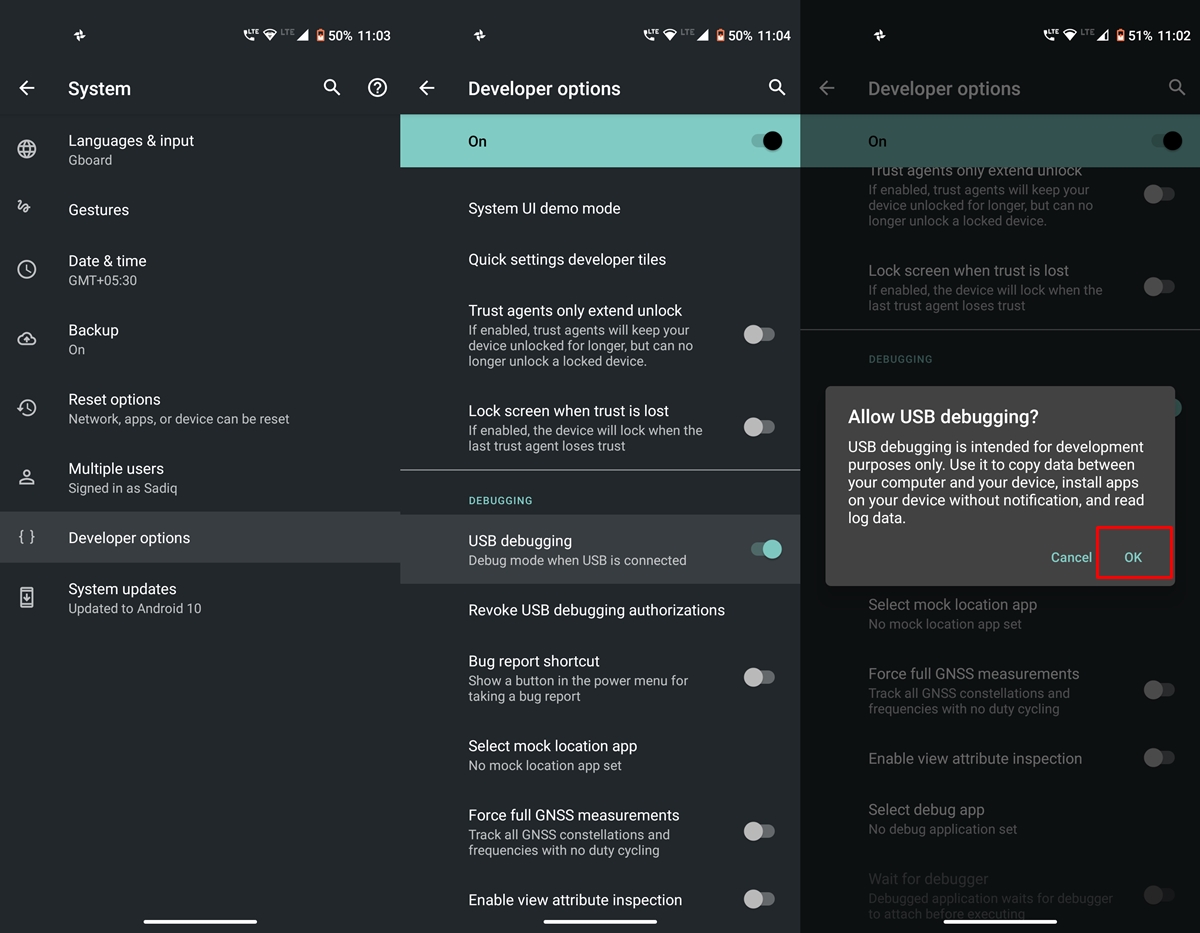
To begin with, if you are doing cross-flash (flashing the firmware of any other build), then you need an unlocked bootloader. For that, you may refer to our guide on How to Unlock Bootloader on any Motorola Device.Likewise, enable USB Debugging on your device. This will make your device recognizable by your device in ADB Mode. So head over to Settings > About Phone > Tap on Build Number 7 times > Go back to Settings > System > Advanced > Developer Options > Enable USB Debugging. Next up, download and install the Android SDK Platform Tools on your PC. This will provide you with the necessary ADB and Fastboot files.
That’s it. These were all the requirements, You may now proceed with the steps to install the stock firmware on your Moto G5 device via Fastboot Commands.
Download Moto G5 Stock Firmware
First and foremost, get hold of the stock firmware file for your Moto G5 device. Make sure to download the correct region’s firmware file:
Download: Motorola Moto G5 Cedric Stock Firmware Collection
How to Install Stock Firmware on Motorola G5 via Fastboot
With the firmware now downloaded, here are the steps to Install Stock Firmware on Motorola G5 via Fastboot commands.
What are the Files to be Flashed
Except for the NVM file, XML files, a text file, and a PNG file, all the other files will be installed or flashed on your Moto G5 device via fastboot commands.
How to fix ADB Device not found [List of Devices Attached is blank]Detailed Steps to Fix adb is not recognized ErrorHow to Fix Unauthorized Device with ADB Commands [3 methods]How to Fix Android Device stuck in Fastboot Mode
Fastboot Commands to Flash Stock Firmware on Moto G5
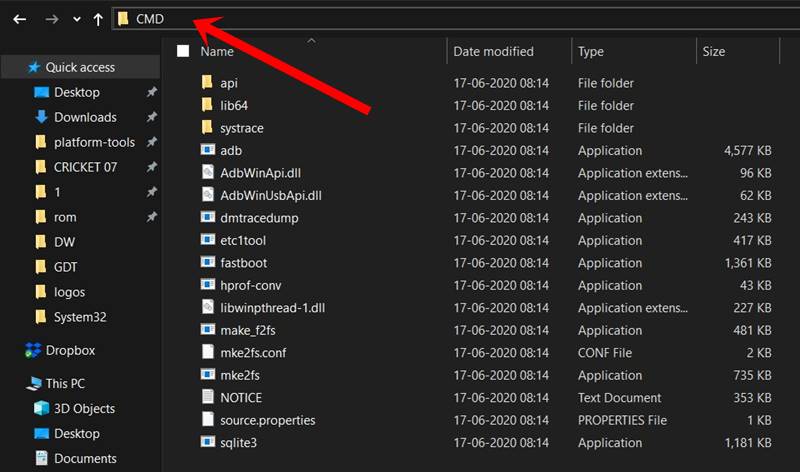
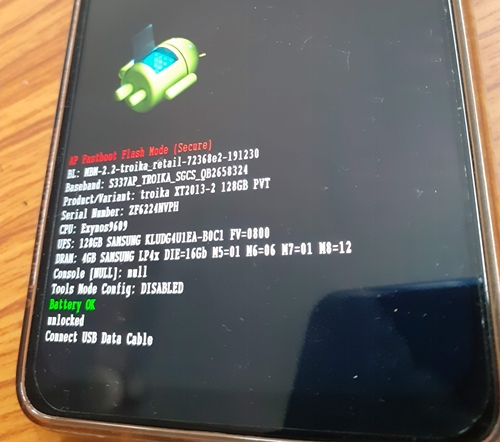
Just paste the below fastboot command on the CMD window that you have opened in the platform-tools folder. Make sure to execute one command at a time, rather than copy-pasting and executing all the commands at one go. Also copy paste these commands in the exact same order as mentioned. The below commands are for Moto G5 codenamed CEDRIC and should not be used on any other device. The entire flashing shouldn’t take more than 5-6 minutes. Only the sparse chunk files take some time to flash. Furthermore, once all the commands are executed, your device will be booted to fastboot. To boot it to Android OS, either do so via the power key or use the fastboot reboot command. With this, we conclude the guide on how to install stock firmware on Motorola Moto G5 via Fastboot commands. If you have any issues queries concerning the aforementioned steps, do let us know in the comments section. We will definitely get back to you with a solution at the earliest.
How to Run ADB Fastboot Commands directly on Android without RootHow to fix FAILED (status read failed (Too many links))Use ADB and Fastboot Commands on Rooted Android Without PCFix error boot prepare- device stuck in fastboot
About Chief Editor